Pages

Friday, July 29, 2011

Almost There . . .


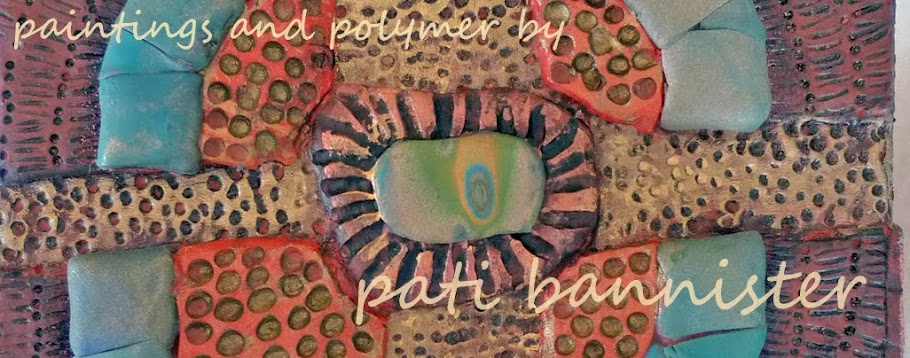
In some ways this box took control of itself somewhere along the way and morphed into something slightly different...voyage of discovery in terms of design and technique. I’ve enjoyed the journey.

Now just some final tweaking here and there...cleaning up the tiny bits of claydust in the gazillion crevasses and then some final buffing and perhaps a tiny bit of wax or polish here and there.


Day 6: Coral-copper/gold striated veneer applied to center motif......crisis! While the colors looked fine together I expected the coral to deepen more than it did in curing and simply didn’t care for it. After a day of looking at it.....

Day 7: Dremel Stylus to the rescue ....not only did the carving dilute the strong color contrast, but I found I loved the element of additional texture

Sunday, July 24, 2011

Day Six

Day Six: A veneer of polymer clay tiles in a blend of moss green, ultramarine, turquoise and copper (Premo) was added and hand-buffed.

A lot of buffing remains, but I am taking the day off.

Friday, July 22, 2011

July 22 2011 Cedar Box in Progress


Day One: Cedar box, gessoed black and incised with Dremel Stylus to establish overall design.

Day Two: Top covered in Polymer Clay (using old fashioned Terra Cotta school clay) at various thicknesses to establish dimensions of design. I then textured the “cross” motif with a ball tool, and incised the outer “frame”.

Days Three & Four: The sides were covered (two each day) in the same manner as the top.

Day Five : The textured areas were antiqued with straight black acrylic paint, forcing paint into the grooves and divots, then wiped.
Then the center motif was dry brushed with a mixture of metallic gold, copper, green and black. Three very light applications were done to achieve sufficient contrast with the outer area with was simply wiped.

Next I will apply polymer clay veneers to the "raw" terra cotta areas and set stones, most likely turquoise, in the centers of the motifs.